Jumat, 24 Januari 2025

How to Make a Wooden Jewelry Organizer for Storing Accessories

Posted by with No comments

Craft Your Dream: A Step-by-Step Guide to Building a Wooden Jewelry Organizer

Tired of tangled necklaces and scattered earrings? Transform your chaotic jewelry collection into a thing of beauty with this detailed guide to crafting your own personalized wooden jewelry organizer. This project is surprisingly accessible, even for beginner woodworkers, and allows for complete customization to match your style and space. Get ready to ditch the jumbled mess and embrace organized elegance!

Planning Your Perfect Organizer

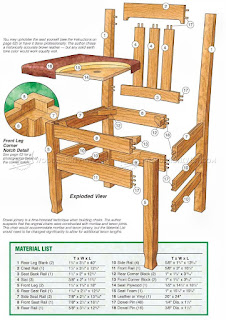
Before diving into the sawdust, careful planning ensures a successful outcome. Consider the size and style you envision. Will it be a wall-mounted unit, a freestanding dresser-top organizer, or perhaps a charming little box? Sketch out your design, noting the dimensions of each compartment. Think about the types of jewelry you'll store â€" long necklaces require vertical space, while earrings benefit from smaller, individual compartments. You'll also need to select your wood. Pine is a budget-friendly option, while hardwoods like oak or maple offer superior durability and a richer aesthetic. Don't forget to account for the hardware â€" hooks, knobs, and hinges add functionality and style.

Choosing Your Materials and Tools

Gather your materials based on your chosen design. For a simple organizer, you'll need:

  • Wooden boards (consider the type and thickness carefully)
  • Wood glue
  • Wood screws
  • Sandpaper (various grits)
  • Wood stain or paint (optional)
  • Finishing sealant (optional)
  • Jewelry hooks
  • Small drawers or compartments (optional)
  • Measuring tape
  • Saw (hand saw or circular saw)
  • Drill
  • Screwdriver
  • Clamps

Constructing Your Wooden Wonder

With your plans and materials ready, it's time to build! Start by cutting your wooden boards to the precise dimensions you planned. Use a saw â€" a circular saw provides cleaner cuts for larger pieces. Always prioritize safety and wear appropriate safety gear, including eye protection and a dust mask. Next, assemble the structure using wood glue and screws. Clamps ensure strong, even bonds while the glue dries. Once the glue is dry (check the manufacturer's instructions), carefully remove the clamps. Now is a good time to add any small drawers or compartments, ensuring they fit snugly and function smoothly.

Adding Finishing Touches

Sand all surfaces thoroughly, starting with coarser grit sandpaper and gradually moving to finer grits. This step is crucial for a smooth, professional finish. Apply your chosen wood stain or paint, following the manufacturer's instructions. Allow ample drying time. For added protection and durability, apply a sealant. Finally, attach your jewelry hooks and knobs. Consider adding felt or soft lining to protect your delicate jewelry from scratches. Your beautifully crafted wooden jewelry organizer is now ready to display and organize your precious accessories!

Showcase Your Creation

Step back and admire your handiwork! Your custom-built jewelry organizer not only provides a practical solution for storing your accessories but also adds a unique, personalized touch to your home décor. Enjoy the satisfaction of a job well done and the organized elegance of your newly crafted storage solution. Remember to share your creation â€" we’d love to see the beautiful results!

Step-by-Step Guide to Building Wooden Chairs for Dining Rooms

Posted by with No comments

A Comprehensive Guide to Crafting Elegant Wooden Dining Chairs

This guide provides a detailed, step-by-step approach to constructing high-quality wooden dining chairs suitable for any elegant dining room. The process requires careful planning, precision in execution, and a basic understanding of woodworking techniques. While familiarity with woodworking tools is assumed, safety precautions are emphasized throughout. Always prioritize safety and wear appropriate personal protective equipment (PPE) including safety glasses, hearing protection, and dust masks.

Phase 1: Design and Planning

Selecting the Design

The initial step involves selecting a suitable chair design. Consider factors such as the overall style of your dining room, the available space, and your personal aesthetic preferences. Numerous chair designs are available online and in woodworking books, ranging from simple Shaker-style chairs to more intricate Victorian designs. Choose a design that aligns with your skill level; beginners might start with simpler designs before tackling more complex projects.

Material Selection

The choice of wood significantly impacts the chair's durability, aesthetic appeal, and overall cost. Hardwoods like oak, maple, cherry, and walnut offer superior strength and longevity but are generally more expensive. Softwoods such as pine and fir are more affordable but may require extra care to prevent damage. Consider the wood's grain, color, and workability when making your selection. Ensure that the wood is properly seasoned (dried to the appropriate moisture content) to prevent warping or cracking.

Gathering Tools and Materials

Before commencing the project, compile all necessary tools and materials. This comprehensive list ensures a smooth workflow and minimizes interruptions.

  • Wood: Sufficient quantities of your chosen wood, accounting for cuts, mistakes, and potential waste.
  • Woodworking Plans: Detailed blueprints or diagrams of your chosen chair design.
  • Measuring Tools: Tape measure, combination square, marking gauge.
  • Cutting Tools: Hand saw (or power saw), chisel, router (optional).
  • Joinery Tools: Clamps, drill, drill bits, screws, wood glue, dowels (optional).
  • Finishing Tools: Sandpaper (various grits), staining materials (optional), clear finish (polyurethane, varnish, etc.).
  • Safety Equipment: Safety glasses, hearing protection, dust mask, work gloves.

Phase 2: Construction

Cutting the Wood Components

Carefully study your woodworking plans and precisely cut all wood components according to the specified dimensions. Accurate cuts are crucial for proper assembly and overall chair stability. Use a sharp saw to minimize tear-out and ensure clean cuts. Number or label each piece to avoid confusion during assembly.

Creating the Chair Legs

The legs form the foundation of the chair. Depending on the design, they might be straight, tapered, or have more intricate shapes. Ensure they are precisely cut to the correct length and angle. Check for squareness using a combination square to ensure stability.

Assembling the Chair Frame

Assemble the chair frame using appropriate joinery techniques. Common techniques include mortise and tenon joints, dowel joints, or screw joinery. Apply wood glue to all joints for enhanced strength and stability. Use clamps to secure the joints while the glue dries. Allow sufficient drying time before proceeding to the next steps.

Adding the Seat and Backrest

Once the chair frame is assembled and the glue is dry, attach the seat and backrest components. The method will vary depending on the design. Some designs might use simple screw joinery, while others may incorporate more complex techniques like weaving or chair caning. Ensure the seat and backrest are securely attached and properly aligned with the chair frame.

Phase 3: Finishing

Sanding

Thorough sanding is essential to achieve a smooth, even surface. Begin with coarser grit sandpaper (e.g., 80-grit) to remove any imperfections and gradually progress to finer grits (e.g., 120, 180, 220-grit) for a flawless finish. Sand in the direction of the wood grain to avoid scratches. Pay special attention to edges and corners.

Applying Finish

After sanding, apply your chosen finish. This could be a stain to enhance the wood's natural color, a paint for a more vibrant look, or a clear finish like polyurethane or varnish to protect the wood from moisture and wear. Follow the manufacturer's instructions carefully for application and drying times. Apply multiple thin coats, allowing each coat to dry completely before applying the next, for optimal protection and durability.

Phase 4: Quality Control and Refinement

Inspecting the Chair

Before declaring the project complete, meticulously inspect the finished chair. Check for any loose joints, imperfections in the finish, or areas requiring additional sanding. Address any flaws before the project is deemed finalized.

Testing the Chair's Stability

Test the chair's stability by sitting on it and applying gentle pressure to different areas. Ensure it is sturdy and comfortable. If any issues are detected, address them before putting the chair into regular use.

Conclusion

Creating your own wooden dining chairs is a rewarding project that allows for personalization and the creation of unique, high-quality furniture. While demanding time and effort, the process empowers you to tailor your dining room's aesthetic, crafting pieces that reflect your personal taste and skill. Remember to always prioritize safety and take your time; the result will be a set of chairs you can be proud of for years to come.

Elegant Wooden Four-Seater Picnic Table for Patios and Gardens

Posted by with No comments

Indulge in Outdoor Elegance: The Four-Seater Wooden Picnic Table

Imagine balmy summer evenings spent sharing laughter and delicious food with loved ones, surrounded by the beauty of your garden or patio. This dream becomes reality with our exquisitely crafted four-seater wooden picnic table. More than just a piece of outdoor furniture, it's an invitation to create lasting memories in a setting that exudes both rustic charm and sophisticated style. Built to withstand the elements and designed for enduring comfort, this table promises years of delightful outdoor gatherings.

Unrivaled Craftsmanship and Durability

We utilize only the finest, sustainably sourced hardwood to construct each picnic table. The wood undergoes a rigorous selection process, ensuring only the strongest and most visually appealing planks are used. Expert craftsmen then employ traditional joinery techniques, resulting in a robust and exceptionally durable structure that will grace your outdoor space for years to come. The meticulous attention to detail extends to every aspect of the design, from the smooth, hand-sanded finish to the perfectly aligned seating. This isn't just furniture; it's a testament to the enduring artistry of skilled craftsmanship.

A Legacy of Quality

Our commitment to quality goes beyond the materials and construction. We meticulously inspect every table before it leaves our workshop, guaranteeing you receive a piece that meets our exacting standards. We believe in creating heirloom-quality furniture that you can pass down through generations, a piece that stands as a symbol of timeless elegance and enduring strength. Invest in a piece that will enhance your outdoor space for years to come, and become a cherished part of your family's history.

Effortless Style for Any Outdoor Setting

The elegant design of our four-seater picnic table effortlessly complements a wide range of outdoor styles. Its classic lines and natural wood finish lend themselves equally well to a rustic cottage garden, a contemporary patio, or a traditional backyard setting. The rich, warm tones of the wood add a touch of sophistication to any space, while its sturdy construction provides a sense of reliability and permanence. Imagine the table as a focal point for your outdoor entertaining, a welcoming gathering place where cherished moments unfold.

Versatile Design for Maximum Enjoyment

More than just a place to eat, this table provides a versatile space for a variety of outdoor activities. Use it for casual meals, lively game nights, or simply as a relaxing spot to enjoy a quiet cup of coffee and a good book. Its ample surface area provides plenty of space for food, drinks, and games, making it ideal for both intimate gatherings and larger parties. The comfortable seating ensures everyone enjoys a relaxed and enjoyable experience.

Easy Maintenance and Long-lasting Beauty

We understand the importance of low-maintenance outdoor furniture. Our picnic table’s durable hardwood construction requires minimal upkeep. Regular cleaning with a mild soap and water solution will keep it looking its best. We recommend applying a protective sealant periodically to further enhance its weather resistance and prolong its lifespan. With proper care, this table will continue to be a beautiful and functional addition to your outdoor living space for years to come, requiring minimal effort to maintain its elegant appearance.

Benefits at a Glance:

  • Sustainably sourced hardwood for exceptional durability and beauty.
  • Expert craftsmanship using traditional joinery techniques.
  • Elegant and versatile design that complements any outdoor style.
  • Ample surface area for food, drinks, and games.
  • Comfortable seating for a relaxed and enjoyable experience.
  • Low-maintenance design for easy cleaning and upkeep.

Order your elegant four-seater wooden picnic table today and transform your outdoor space into a haven for unforgettable memories. Experience the difference that quality craftsmanship and timeless design can make.

How to Build a Floating Console Table for Minimalist Spaces

Posted by with No comments

Constructing a Floating Console Table for Minimalist Aesthetics

The minimalist aesthetic, characterized by its clean lines, uncluttered surfaces, and functional design, prioritizes both form and utility. A floating console table perfectly embodies these principles, offering a practical storage solution while maintaining a sense of spaciousness and visual lightness. This comprehensive guide details the process of building such a piece, suitable for even novice woodworkers, ensuring a stylish and functional addition to any minimalist interior.

I. Planning and Material Selection

Before commencing construction, meticulous planning is crucial for achieving a seamless and aesthetically pleasing result. This involves determining the desired dimensions, selecting appropriate materials, and procuring necessary tools.

A. Determining Dimensions and Design

The dimensions of the console table should be carefully considered based on the available space and intended functionality. Measure the wall space where the table will be installed to ensure a proper fit. Consider the length required for storage or display purposes. A typical floating console ranges from 36 to 72 inches in length, with a depth of 12 to 18 inches and a height of approximately 30 inches. The exact dimensions are entirely dependent on personal preference and spatial constraints. Sketch a detailed design, including the shelf dimensions, bracket placement, and any desired additional features, such as integrated drawers or cable management solutions.

B. Material Selection: A Focus on Minimalist Aesthetics

The choice of materials significantly impacts the final aesthetic and durability of the console table. Opt for materials that complement the minimalist style, favoring clean lines and natural textures. Popular choices include:

  • Solid wood: Oak, maple, walnut, or birch offer a timeless and sophisticated look. Ensure the wood is properly dried to prevent warping or cracking.
  • Plywood: A cost-effective alternative to solid wood, plywood offers excellent stability and can be finished to mimic the appearance of solid wood. Birch plywood is a particularly versatile choice.
  • MDF (Medium-Density Fiberboard): Although not as durable as wood, MDF is easily worked and can be painted or stained to achieve a variety of finishes. It’s a suitable option for a budget-conscious build.

The choice of finish is equally important. A clear coat will showcase the natural grain of the wood, while a solid color paint can provide a modern, clean look. Consider the existing color palette of the room to ensure a harmonious blend.

C. Tool Acquisition and Preparation

Having the right tools at hand significantly streamlines the construction process. Essential tools include:

  • Measuring tape and pencil
  • Circular saw or jigsaw
  • Drill with various drill bits
  • Screwdriver (Phillips and flathead)
  • Sandpaper (various grits)
  • Safety glasses and dust mask
  • Wood glue
  • Clamps
  • Level
  • Stud finder
  • Finishing materials (paint, stain, sealant)

Ensure all tools are in good working order and that appropriate safety measures are in place before commencing work.

II. Construction Process: Building the Console Table

With the planning phase complete, the construction process can begin. This involves precise cutting, assembling, and finishing of the components.

A. Cutting the Wood to Size

Using the detailed design sketch as a guide, carefully cut the wood to the required dimensions. Precise measurements are paramount to ensure a well-fitting and aesthetically pleasing result. Employ a straight edge and utilize a circular saw or jigsaw for clean, accurate cuts. Remember to account for any desired edge detailing or beveling.

B. Assembling the Tabletop and Shelf

Once the pieces are cut, apply wood glue to the edges and clamp them together, ensuring a tight and secure bond. Allow the glue to dry completely before proceeding. For added strength and stability, you can further reinforce the joints using screws or dowels, countersinking the screws to maintain a clean surface.

C. Installing the Brackets

The brackets are the critical components that support the floating effect. Choose sturdy brackets designed for the weight of the console table and the chosen materials. Accurately locate the studs in the wall using a stud finder, ensuring the brackets are firmly secured to the wall structure. Pre-drill pilot holes to prevent wood splitting before screwing the brackets into place. Ensure the brackets are level to guarantee the stability of the floating console table. Carefully attach the tabletop and shelf to the brackets, following the manufacturer’s instructions.

III. Finishing Touches: Enhancing Minimalist Aesthetics

The final steps involve refining the appearance and protecting the console table from damage. These finishing touches are crucial in achieving a polished and professional look.

A. Sanding and Smoothing

Thoroughly sand all surfaces using progressively finer grits of sandpaper, starting with a coarser grit (e.g., 80-grit) to remove any imperfections and finishing with a finer grit (e.g., 220-grit) for a smooth finish. This step is crucial for achieving a flawless final appearance, ensuring the even application of paint or stain.

B. Applying the Finish

Apply the chosen finish according to the manufacturer's instructions. Whether opting for a clear coat, stain, or paint, ensure even application and allow sufficient drying time between coats. Multiple coats are often necessary to achieve a durable and aesthetically pleasing finish. Use a quality brush or sprayer to ensure a smooth, even application, minimizing brushstrokes or spray imperfections.

C. Final Inspection and Installation

Once the finish is completely dry, conduct a final inspection to ensure the console table is structurally sound and aesthetically pleasing. Make any necessary adjustments before installing the console table on the wall. Use a level to ensure the table is perfectly horizontal, giving it a clean and precise appearance. This final stage completes the project, adding a functional and stylish piece to your minimalist interior.

By following these detailed steps, you can successfully construct a beautiful and functional floating console table that perfectly complements your minimalist living space. Remember that meticulous planning, careful execution, and attention to detail are key to achieving a professional and satisfying result. Enjoy the process of building your custom piece and the satisfaction of creating a unique addition to your home.

Creative Ideas for Painting or Staining Wooden Coasters

Posted by with No comments

Uncork Your Creativity: Stunning Coaster Designs for Every Style

Wooden coasters are more than just functional; they're miniature canvases waiting for your artistic touch. Transform ordinary wood slices into unique, conversation-starting pieces with these creative painting and staining techniques. Forget mass-produced uniformity; let's dive into a world of personalized coaster designs that perfectly reflect your style and add a touch of handcrafted charm to your home.

Embracing the Natural Beauty: Stained Coasters

Sometimes, less is more. Highlighting the natural grain and texture of the wood with a stain creates a sophisticated and timeless look. Experiment with various wood types â€" the rich, deep tones of walnut contrast beautifully with the lighter hues of maple or birch. Choose from a spectrum of stain colors, from warm honey tones to cool gray washes, to achieve the desired aesthetic. Apply the stain evenly using a rag or brush, ensuring complete coverage without leaving any drips or streaks. Seal the stain with a clear coat of polyurethane for lasting protection against spills and water damage. Consider using different staining techniques like applying a darker stain to the edges for a rustic look or creating a distressed finish with sandpaper after the stain has dried for a vintage appeal.

Highlighting the Grain with Color Wash

A color wash offers a subtler approach to staining. Dilute your chosen stain with mineral spirits to achieve a translucent finish that subtly enhances the wood grain. Apply the diluted stain liberally, and immediately wipe off the excess with a clean cloth, leaving only a thin veil of color. This technique allows the wood’s natural beauty to shine through while adding a hint of color. Experiment with different levels of dilution to achieve varying levels of transparency, and consider layering two or three shades for a more complex effect.

Painting Your Personality: Artistic Coaster Creations

Unleash your inner artist and transform your coasters into miniature masterpieces! Acrylic paints are a fantastic choice for their versatility and ease of use. You can create anything from geometric patterns and bold stripes to intricate floral designs and whimsical animals. Use painter's tape for crisp lines and precise patterns, or let your creativity flow with freehand designs. Don't be afraid to experiment with different techniques, like sponging, stippling, or dry brushing, to add texture and depth to your artwork.

Geometric Patterns and Bold Designs

Geometric patterns offer a clean, modern aesthetic. Use painter's tape to create sharp lines and distinct shapes. Experiment with various combinations of colors and patterns, from simple stripes and chevrons to more complex tessellations. For added impact, consider incorporating metallic acrylic paints for a touch of glamour. Before starting, sketch your chosen design lightly on the coaster with a pencil to guide your painting process. Remember to let each layer of paint dry completely before applying the next.

Whimsical Illustrations and Nature-Inspired Scenes

Bring nature's beauty or charming illustrations to life on your coasters. Think delicate floral motifs, playful animals, or miniature landscapes. Use fine-tipped brushes for detailed work and don't hesitate to layer colors to create depth and dimension. Freehand sketching is encouraged; let your artistic impulses guide you. Remember to seal your artwork with a protective clear coat to prevent chipping and smudging, ensuring your coasters remain beautiful for years to come.

Adding the Finishing Touch: Protective Coatings and Personalization

Once your masterpiece is complete, sealing it with a clear coat of polyurethane is crucial. This protects your design from scratches, spills, and wear, ensuring your coasters stay beautiful for years to come. Consider adding a final touch of personalization â€" perhaps a subtle monogram, a meaningful date, or a quirky quote. You can use a thin-tipped paint pen or even embossing techniques to add this special detail. The possibilities are truly endless; let your imagination run wild and create coasters that are as unique and beautiful as you are!

Pro Tip: Always test your paints and stains on scrap wood first to ensure you achieve your desired color and effect before working on your coasters.

Rabu, 20 November 2024

Small Christmas Wood Craft Ideas for Gifts

Posted by with No comments
Small Christmas Wood Craft Ideas for Gifts

Small Christmas Wood Craft Ideas for Gifts

The holiday season is a time for giving, and what better way to express your love and appreciation than with a handcrafted gift? Wood crafts offer a unique and thoughtful way to celebrate Christmas, bringing warmth and a touch of rustic charm to your loved ones’ homes. Whether you're a seasoned woodworker or just starting out, these small wood craft ideas are perfect for crafting delightful Christmas gifts that are sure to be cherished.

Rustic Christmas Ornaments

Ornaments are a classic Christmas decoration that add a touch of festive cheer to any tree. Wooden ornaments offer a unique and sustainable alternative to traditional plastic ornaments, adding a touch of rustic charm to your holiday decor. These ornaments can be personalized with initials, dates, or special messages, making them a truly meaningful gift.

Simple Shapes:

Begin with simple shapes like stars, snowflakes, hearts, or even Christmas trees. Cut these shapes using a jigsaw or scroll saw, sanding the edges for a smooth finish. You can paint them with festive colors or leave them natural for a rustic look. Add embellishments like glitter, ribbons, or tiny bells for a personalized touch.

Personalized Ornaments:

For a unique touch, personalize your ornaments with names, dates, or meaningful quotes. You can use a wood-burning tool to etch designs or letters onto the surface. Alternatively, use paint pens or stencils to create personalized messages or images.

Natural Wood Ornaments:

Embrace the natural beauty of wood by leaving the ornaments unpainted. Sand the wood smooth and consider adding a natural oil finish to enhance its grain. These ornaments can be decorated with dried berries, cinnamon sticks, or pine cones for a rustic and elegant look.

Wooden Christmas Coasters

Wooden coasters add a touch of warmth and elegance to any coffee table. These small crafts make excellent gifts, especially for coffee enthusiasts or those who love to host gatherings.

Simple Square or Round Coasters:

Start with basic square or round shapes, using a jigsaw or scroll saw for cutting. Sand the edges smoothly, and consider adding a protective coat of varnish or sealant to prevent water damage.

Personalized Coasters:

Add a personal touch to your coasters by engraving initials, dates, or festive designs. You can also use paint pens to create intricate patterns or holiday motifs.

Rustic Coasters with Natural Elements:

For a truly rustic look, incorporate natural elements such as river rocks, pine cones, or bark into your coasters. Secure these elements using wood glue and create a unique and natural design.

Miniature Wooden Christmas Trees

Small wooden Christmas trees bring a touch of festive charm to any home. These miniature trees can be placed on shelves, mantles, or even used as unique table centerpieces.

Simple Triangle Shapes:

Start by cutting out triangle shapes from wood, using a jigsaw or scroll saw. Sand the edges smoothly and consider painting them with festive colors or leaving them natural.

Layered Trees:

Create a layered effect by cutting out several triangle shapes of varying sizes. Glue these shapes together, starting with the largest triangle at the base, to create a tiered effect.

Decorated Trees:

Embellish your miniature trees with beads, ribbons, or tiny ornaments. You can also use paint pens to add details or patterns to the trees.

Wooden Christmas Sign

Wooden signs are a wonderful way to add a festive touch to any home. You can create a simple sign with a seasonal message, a personalized greeting, or even a humorous holiday quote.

Simple Rectangular or Round Sign:

Begin with a simple rectangular or round wooden board. Use a scroll saw to cut out intricate shapes, or use a wood-burning tool to create designs.

Personalized Sign:

Add a personal touch to your sign with a name, a special message, or a quote. You can use a wood-burning tool to etch letters and designs, or use paint pens or stencils to create personalized messages.

Festive Sign with Ornaments:

Decorate your sign with small Christmas ornaments, ribbons, or pine cones. You can attach these decorations using hot glue or glue dots, adding a festive touch to the sign.

Tips for Creating Your Wood Crafts

Here are some tips to help you create beautiful and lasting wood crafts for your loved ones this Christmas:

  • Choose the right wood: Consider the type of wood you want to use. Softwoods like pine and cedar are easy to work with and are often affordable. Hardwoods like maple and oak are more durable and offer a beautiful grain, but they are also more challenging to work with.
  • Safety first: Always wear safety glasses and a dust mask when working with wood, especially when using power tools.
  • Start with simple designs: If you are new to woodworking, start with simple shapes and designs before moving on to more intricate projects.
  • Sanding is key: Sanding your projects smooth ensures a professional finish and a comfortable feel. Use a variety of sandpaper grits, starting with a coarser grit to remove imperfections and finishing with a finer grit for a smooth surface.
  • Finish your work: A protective finish helps to protect your wood crafts from water damage, scratches, and dirt. Consider using a sealant, varnish, or wax to enhance the look of your crafts.

With these ideas and a little bit of creativity, you can create unique and meaningful Christmas gifts from wood that will be cherished for years to come. Embrace the joy of crafting and give the gift of warmth, creativity, and love this holiday season.

Selasa, 19 November 2024

High-Quality Wood Serving Tray Ideas for Your Side Hustle

Posted by with No comments
High-Quality Wood Serving Tray Ideas for Your Side Hustle

High-Quality Wood Serving Trays: A Side Hustle with a Touch of Elegance

In a world where consumers crave unique, handcrafted items, a side hustle involving high-quality wood serving trays can be a lucrative and fulfilling endeavor. This article will delve into the compelling reasons to embark on this path, providing insights into the creation, marketing, and successful establishment of your wood serving tray business.

The Allure of Wood Serving Trays: Why They Make a Perfect Side Hustle

Wood serving trays possess a timeless appeal that resonates with a wide audience. Their natural beauty, durability, and versatility make them a coveted addition to any home. This intrinsic value translates into a strong market demand, allowing your side hustle to thrive.

Market Demand and Target Audience

The demand for wood serving trays extends across various demographics, making them an ideal product for a diverse target audience. From individuals seeking unique home decor pieces to event planners and restaurateurs looking for elegant serving solutions, there's a place for your creations in the market.

Profitability and Sustainability

Wood serving trays offer excellent profit margins, particularly when crafted with high-quality materials and attention to detail. The inherent durability of wood ensures your products stand the test of time, providing long-term value to customers. Additionally, the use of sustainable wood sources aligns with environmental consciousness, enhancing the appeal of your business.

Creative Expression and Personal Touch

Wood serving trays provide a canvas for your creativity. You can experiment with different wood types, finishes, and designs to craft unique pieces that reflect your artistic vision. Each tray becomes a testament to your craftsmanship and a reflection of your personal touch, setting you apart in a crowded marketplace.

Crafting High-Quality Wood Serving Trays: A Step-by-Step Guide

Creating exceptional wood serving trays requires a blend of skill, knowledge, and dedication. This section provides a comprehensive guide to crafting high-quality products that will delight customers and elevate your side hustle.

Choosing the Right Wood

Selecting the right wood is paramount to the durability, aesthetic appeal, and longevity of your serving trays. Consider factors such as:

  • Hardness: Opt for hardwoods like walnut, maple, or cherry, known for their strength and resistance to scratches.
  • Grain Pattern: Different wood species exhibit unique grain patterns that add visual interest and character to your trays.
  • Color: Choose woods that complement the intended style and color scheme of your trays, offering a diverse palette to your creations.
  • Sustainability: Prioritize responsibly sourced wood to ensure the ecological integrity of your business.

Designing and Cutting

The design phase involves creating blueprints, templates, and precise measurements. Use tools like a band saw, table saw, or jigsaw to cut the wood according to your chosen design. Ensure clean, accurate cuts for a professional finish.

Assembly and Finishing

Assemble the tray components using glue, screws, or dovetail joints, depending on the design. Once assembled, apply a finishing touch with sandpaper to create smooth surfaces. Choose your preferred finishes, such as oil, wax, or polyurethane, to enhance the wood's natural beauty and protect it from wear and tear.

Adding Personal Touches

Set your trays apart by incorporating unique elements like:

  • Inlay Work: Use contrasting wood species to create intricate patterns or designs.
  • Carving: Add decorative elements or motifs to the surface of the trays using carving techniques.
  • Metal Accents: Incorperate metal handles, feet, or decorative accents to enhance the trays' functionality and aesthetics.

Marketing and Selling Your Wood Serving Trays

Once you've crafted your beautiful wood serving trays, it's time to showcase your work and reach your target audience. This section explores effective marketing strategies for your side hustle.

Building an Online Presence

Establishing an online presence is crucial for reaching a broader customer base. Consider creating:

  • Website: A dedicated website allows you to showcase your products, share your story, and provide contact information.
  • Social Media Accounts: Platforms like Instagram, Facebook, and Pinterest provide visual platforms to promote your creations.
  • Etsy Shop: Etsy is a popular marketplace specifically for handcrafted and vintage goods, providing access to a readymade audience.

Crafting Compelling Product Descriptions

When writing product descriptions, emphasize the unique qualities of your wood serving trays, including:

  • Wood Type: Highlight the chosen wood species and its characteristics.
  • Design: Describe the design features, dimensions, and craftsmanship.
  • Finishes: Specify the type of finish used and its properties.
  • Care Instructions: Provide guidance on how to care for and preserve the wood.

Engaging with Your Audience

Building a strong online presence goes beyond product descriptions. Engage with your followers by:

  • Responding to Comments and Questions: Provide timely and helpful responses to build trust and rapport.
  • Sharing Behind-the-Scenes Content: Give customers a glimpse into your creative process and craftsmanship.
  • Running Contests and Giveaways: Generate excitement and attract new followers.

Exploring Offline Opportunities

Don't limit yourself to the online realm. Consider exploring offline marketing opportunities, such as:

  • Local Craft Fairs and Markets: Showcase your trays at events that attract your target audience.
  • Collaborations with Local Businesses: Partner with shops, cafes, or restaurants to display and sell your trays.
  • Word-of-Mouth Marketing: Encourage satisfied customers to spread the word about your creations.

Building a Sustainable and Successful Side Hustle

Creating a thriving side hustle with wood serving trays requires a combination of passion, creativity, and business acumen.

Continuous Improvement and Innovation

Stay ahead of the curve by continuously seeking new skills, techniques, and designs. Experiment with different wood types, finishes, and decorative elements to diversify your offerings and meet evolving customer preferences.

Building a Strong Brand Identity

Develop a unique brand identity that reflects your values, style, and commitment to quality. This will help you stand out in a competitive market.

Customer Service and Feedback

Exceptional customer service is essential for building loyalty and word-of-mouth referrals. Respond to inquiries promptly, address any concerns with empathy, and strive to exceed customer expectations. Valuing customer feedback and incorporating suggestions can lead to improvements in your products and services.

Growth and Expansion

As your business gains traction, consider strategies for growth and expansion, such as:

  • Expanding Your Product Line: Offer complementary products like cutting boards, coasters, or charcuterie boards.
  • Wholesale Opportunities: Explore partnerships with retailers or boutiques to broaden your distribution.
  • Investing in Equipment: Upgrade your tools and equipment to increase production capacity and efficiency.

A side hustle with high-quality wood serving trays can be a fulfilling and profitable endeavor. By combining craftsmanship, marketing savvy, and dedication to customer satisfaction, you can establish a successful business that brings both joy and financial rewards.